
In recent years I have gotten into cosplay!
So when I travelled to PAX 2015, I wanted to dress up at least one day. I love costume parties, and this has now been extended to forays into cosplay (a contraction of the words costume play, is a performance art in which participants called cosplayers wear costumes and fashion accessories to represent a specific character.).
But an issue I have with costumes is that so many of the female ones are skimpy! One of my favourite games on Playstation came to the rescue: Journey.


Simple? Check.
Fully clothed? Check.
No foam armour or elaborate weapons required? Check!
I went to Spotlight and bought something like 12 metres of dark red cotton fabric. Then there was:
Venture Cosplay
 And it was amazing! I altered it a little, but in general it was a great tutorial to follow with every step you needed.

 Once everything had dried and been ironed to seal it, I cut the glyph shapes out.
To make the red shapes on either side of the scarf, I used another template and red fabric paint. I thought that doing it all in small bits of fabric would be too fiddly, so printing was easier. Less things to sew down!

*Image thanks to Venture Cosplay
The red geometric shapes were ironed on with iron-on fabric glue, and then sewn down around the edges.
 In the game, you are on a Journey to an unknown endpoint, and you pass through different challenging areas. Your poor scarf becomes frayed, so I deliberately let this happen to the edges. The scarf was joined to the top of the cloak.
 What we did discover on the day... is that you don't want things hanging down too low because people in the crowd will step on you! Some creative pinning with merchandise was required (lucky Fallout 4 was a feature):

There are little ear-like points at the top of the hood. And on the first one that I made they were far too big, but also the hood was too small for my head. I cut patterns out of paper and kept fiddling until I was happy.


 All of the sewing was just attaching the correct pieces and then hemming in red and yellow.
I thought about putting organza across the eye holes as well, but honestly I ran out of time.

Instead of one circular piece they were in four sections. I joined these four pieces, overlocked each edge, and then hemmed the bottom and top.
A simple seam closure at the top kept the cloak closed. The cloak was heavy, which would put strain on any clasps or hooks that I might have used instead.
 The hard part: the pattern.
There are big, darker red triangles that come up from the bottom of the cloak. These were ironed on and then the edges sewn down.
Next was the yellow pattern. This is where the iron-on fabric glue saved me again. I had more than 50 small yellow pieces to attach in this pattern, as well as the two lines that ran the full length of the bottom of the cloaks:
 I pinned the bottom yellow strip, then pinned the uprights into place, and ironed all of them down. After that I ironed the top strip down as well, and by leaving it to last I could cover up any place where I may not have cut the uprights exactly the same size.
Everything was pretty secure, so I only sewed the long strips down and not each individual upright - which would have taken hours!
What I did discover once I had done this, was that the cloak is meant to have a red strip at the bottom as well and I had left it out. Luckily I had narrow red binding bias at home, so I used this to create the red strip.
 It was hours of work, and a lot of fabric to be man-handling once the cloaks were one whole piece. But it was well worth the effort.
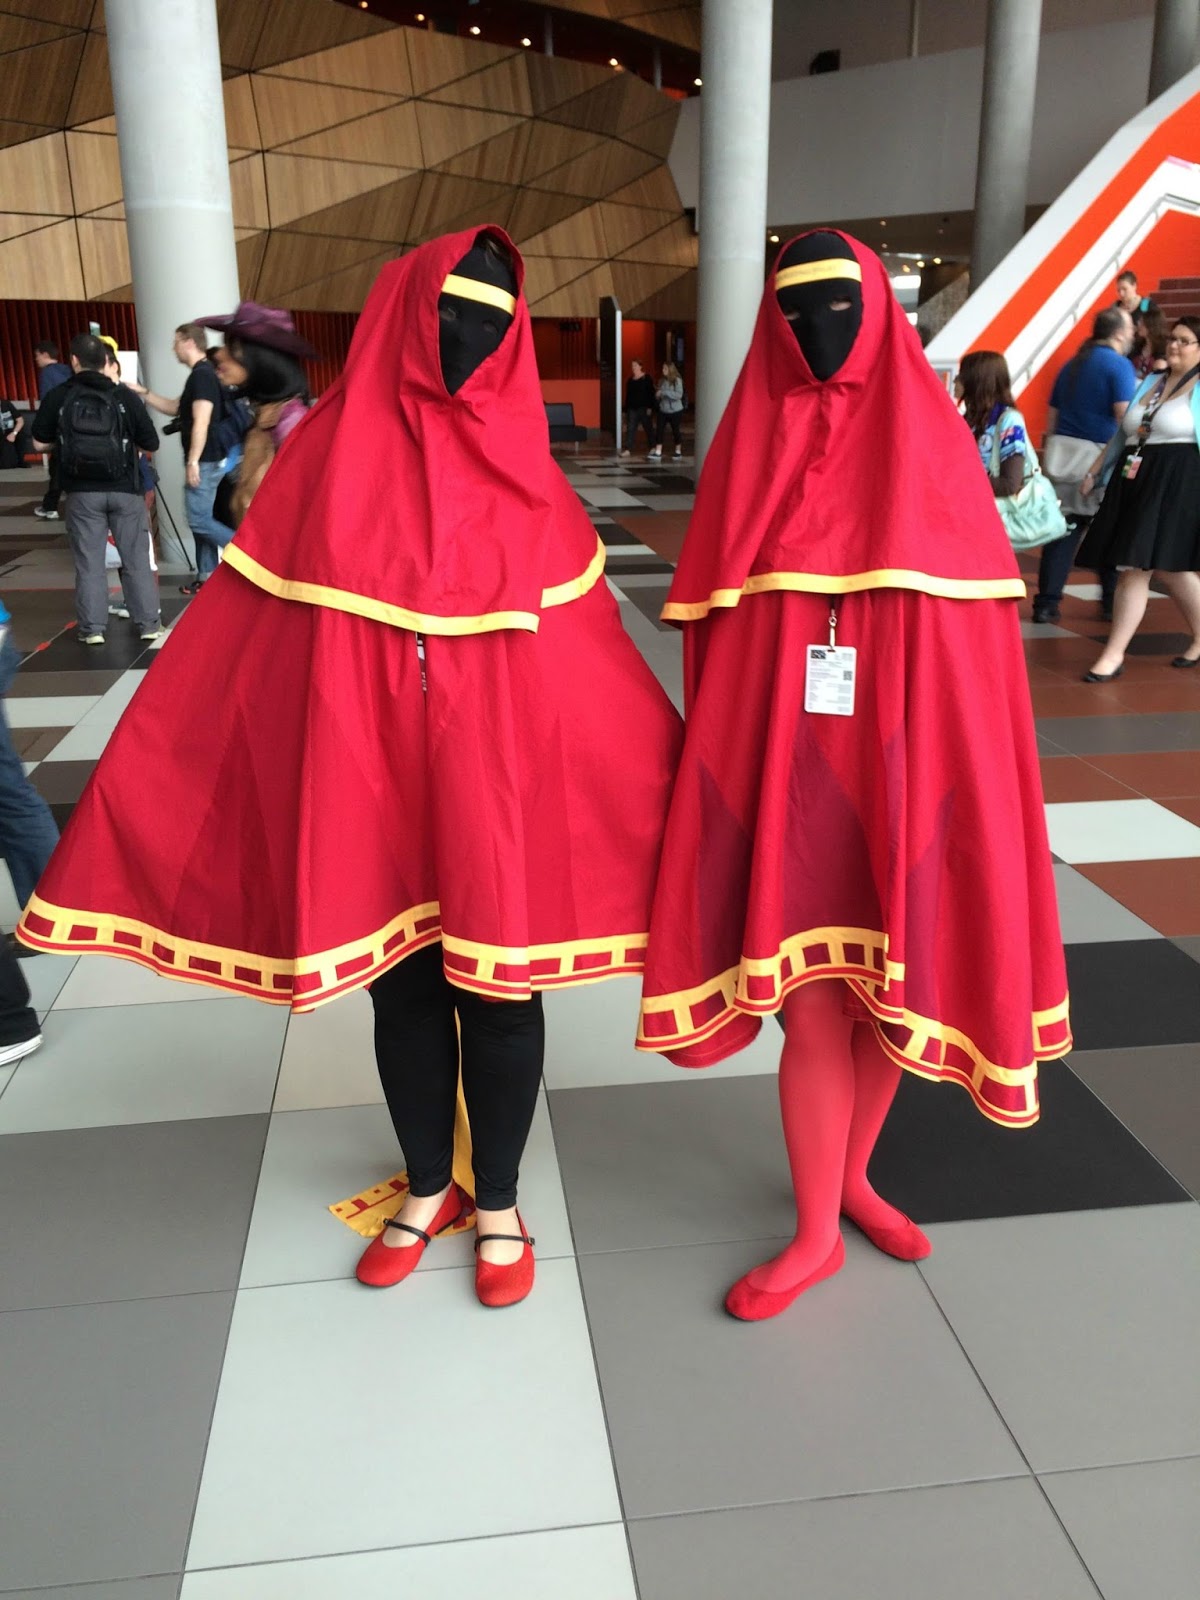
 We wore red shirts and tights under our cloaks for the day, as well as our matching bags:

There were some amazing cosplayers at PAX, and we were pleasantly surprised at how many people knew the Journey game and came up to us for photos. We would just hear 'Journey!' called out constantly, as people tended to forget that our characters were just called 'travellers' in the game.
The more you re-play Journey, which is only short but amazing and beautiful, and find more hidden glyphs, or help other travellers out, the more gold patterns appear on your cloaks. I aim to add more to ours in the future!
Here's a few fellow travellers we met. Enjoy.
Fully clothed? Check.
No foam armour or elaborate weapons required? Check!
I went to Spotlight and bought something like 12 metres of dark red cotton fabric. Then there was:
- a couple of metres of bright yellow cotton
- some silver fabric paint
- several packets of iron-on fabric bond paper
- a plain full-face mask
- stretchy black fabric to cover the mask
- Cloak
- Hood
- Scarf
- Mask
Venture Cosplay

Scarf
I printed all of my glyphs first, using the silver fabric paint. I cut my own template out of a stiff, plastic sheet and used a small sponge to dab the paint on. I didn't mind the slightly-faded look of the end result.
I actually made two full costumes, as I have a friend who cosplays as well. So I printed 12 glyphs for our scarves, with an additional two glyphs to make into bags for us to use on the day. I didn't want my cosplay look spoiled by my usual black backpack!

To make the red shapes on either side of the scarf, I used another template and red fabric paint. I thought that doing it all in small bits of fabric would be too fiddly, so printing was easier. Less things to sew down!

*Image thanks to Venture Cosplay
The red geometric shapes were ironed on with iron-on fabric glue, and then sewn down around the edges.


Hood
The hoods took some trial and error. Lots of error. And more trials of my patience!There are little ear-like points at the top of the hood. And on the first one that I made they were far too big, but also the hood was too small for my head. I cut patterns out of paper and kept fiddling until I was happy.


Mask
This was probably the easiest part. I put glue all over the mask and stretched a square of black fabric over it. Once it had dried in place I trimmed the edges and glued them on the back, and cut eye holes.I thought about putting organza across the eye holes as well, but honestly I ran out of time.

Cloak
Now, these were a lot of fabric to work with. Unlike the circle shape that Venture Cosplay used, I based my cloaks on an existing pattern that I already had. My main reason for this was that I needed enough fabric to fit around my shoulders and still have the cloak fall down far enough. Being tall, it was hard to find fabric with enough width to cut this circle straight out.Instead of one circular piece they were in four sections. I joined these four pieces, overlocked each edge, and then hemmed the bottom and top.
A simple seam closure at the top kept the cloak closed. The cloak was heavy, which would put strain on any clasps or hooks that I might have used instead.

There are big, darker red triangles that come up from the bottom of the cloak. These were ironed on and then the edges sewn down.
Next was the yellow pattern. This is where the iron-on fabric glue saved me again. I had more than 50 small yellow pieces to attach in this pattern, as well as the two lines that ran the full length of the bottom of the cloaks:

Everything was pretty secure, so I only sewed the long strips down and not each individual upright - which would have taken hours!
What I did discover once I had done this, was that the cloak is meant to have a red strip at the bottom as well and I had left it out. Luckily I had narrow red binding bias at home, so I used this to create the red strip.


PAX 2015
There were some amazing cosplayers at PAX, and we were pleasantly surprised at how many people knew the Journey game and came up to us for photos. We would just hear 'Journey!' called out constantly, as people tended to forget that our characters were just called 'travellers' in the game.
The more you re-play Journey, which is only short but amazing and beautiful, and find more hidden glyphs, or help other travellers out, the more gold patterns appear on your cloaks. I aim to add more to ours in the future!
Here's a few fellow travellers we met. Enjoy.


Final image from Tridian on imgur, who took our photo on the day.
No comments:
Post a Comment