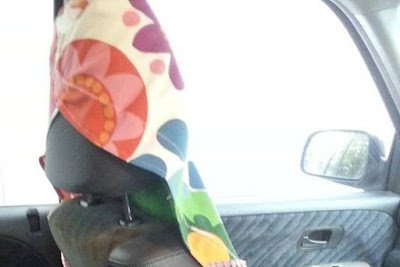
So I've had my car seat covers for a while now. They started in one car. Moved to a second car. And I added a third one for my back seat, too. But as with anything that is used every day, they have started to wear. The towels that sit under the heavy cotton seem fine, but the top layer has some holes.
If you're going to fix something bright, use something bright, right? I plan to continuously patch these car seat covers, so that they just keep evolving. This came from my box of scraps. Seemed like the right size.
I had already patched a smaller hole on this cover before I saw the larger one above.
I put a scrap under the top layer for this patch and used zigzag stitch all over it to hold the rip in place and support it. I stitched some extra support into the surrounding material as well.
Back to the big rip. I pinned the fabric in place with all of the edges tucked under so nothing else could fray.
Whizz it through the sewing machine and there it is, with a couple of cross lines of stitching for support.
Doesn't quite match, but it fits the general theme.
While I had the covers off I did some hemming as well, as I had over-estimated when I upgraded the covers from my last car to this one, with the bigger seats.
Back to comfort in the car!
#lovelypennypatterns
Showing posts with label IKEA. Show all posts
Showing posts with label IKEA. Show all posts
Friday, April 13, 2018
Saturday, January 14, 2017
Commercial Car Seat Covers = Not Creative
My first thought these days is: I can make that.
Somehow.
I will make it instead of buying it.
I will use excess towels, and fabric from IKEA, and make car seat covers that are comfortable and greatly please me.
So I did it.
We had something like twelve towels in our cupboard at this point, which was too many for just the two of us. There are now four less, as I made chairs covers for our desk chairs as well (got all inspired).
I sewed my bright, cotton drill IKEA fabric to my towels, tucking the fabric over the edge to create a hem around it.
I then took my cover out to the car with some pins, and wrapped one end around the headrest until it slipped over nicely.
That was sewn into place on both covers and then I was ready to add ties.
I decided that there needed to be three connection points, to make it attach nicely to the chairs.
Something you may notice as this blog progresses, is my slight obsession with mens' ties. Neckties. I love them. They become bag handles, dresses, headbands, and anything I can think of. I pretty much buy some every time I step into an op shop. Who can pass on a patterned silk tie for $1?
So I went into my collection and pulled neckties out, as well as two random long triangles of pink fabric that I have (if you're going to be loud, go all the way, right?). There was also a kimono obi tie in bright green that came out.
I lined them up on the covers and this was the end result:
Now my car is the cause of much envy, despite its external appearance. The covers come off easily, and because they're made from sturdy fabric and towels, they wash easily.
My only thing to fix is down the bottom: I put elastic on them, thinking that it could slip around the seat down there. But the seats aren't built like that. So I either need to extend the length of the covers so that the weight of the fabric and gravity drag them down and stop them from scrunching up; or put a long tie that can go all the way under the seat and attach to the back.
I want to go with more fabric - what do you think?
Cheers.
Subscribe to:
Posts (Atom)


