Showing posts with label sew. Show all posts

Saturday, April 25, 2020

Upcycled kimono fabric top

I originally bought two of these pieces of kimono silk to use for my wedding dress, almost 8 years ago. The concept didn't work out and the fabrics have sat in my stash for all this time. The white piece was a gift from a friend that I have used as a scarf. I needed the extra fabric for this project though so it was time to refashion it.
https://drive.google.com/uc?export=view&id=1luqnQn3B12W9l-xW6s9_7Yk5GOfWnomY
This Simplicity pattern is a new favourite of mine
- one of the few that is generous rather than stingy with its measurements. 
There was just enough fabric to cut the top out! The front and back both have seams down the middle, but they look fine.
https://drive.google.com/uc?export=view&id=1yvPix8n0Glb_mYcIRTzxbfUJeuSxl7HG
Kimonos are made from panels of fixed-width fabric, which is why I knew that I could use the two completely different pieces.
The embroidered piece is stiff and has a lot of loose threads on the back that would catch on everything.
https://drive.google.com/uc?export=view&id=10lfN7xwsVruV5uQ2H5FqaG9xhdqs6EYi
I decided to line it with fabric from a dress that I didn’t wear because the cotton was too thin. Green is my favourite colour!
https://drive.google.com/uc?export=view&id=1fLy5HTg9bS9MTu5HM8HCx80AzaJ63U0N
It made the front bulkier but way more comfortable. It also made the seams less bulky. Time to sew the front and back together!
https://drive.google.com/uc?export=view&id=1geArTQomFqwqjWrQhnKEwhRNbmx_gsTF
The next question was sleeves or no sleeves?
https://drive.google.com/uc?export=view&id=120KP3Y4iClAWDOIKiyFnXbSxmTaa7yS-
I went with the sleeves, sewed them on and created a collar.
https://drive.google.com/uc?export=view&id=1T7S5bnSxHUwUYg34rNxOlMBftaoXWzll
I hemmed the bottom, turning the cotton to the front for a contrast. 
https://drive.google.com/uc?export=view&id=1fOJP2FslattQu8aIXxrU7ziGFqsgRsR4
Finished top!
https://drive.google.com/uc?export=view&id=1AYwc4DYLFg-5jdLbRWohrNQpT-jWdqlP
Thought about wearing to to work for frock up Friday, but the outfit was a bit much!
https://drive.google.com/uc?export=view&id=1N8BupBJ3w48ze6JWiOHA8NisYNEBZe01
#lovelypennypatterns

Saturday, April 11, 2020

Owl Dress

I had this fabric in my stash for a few years, waiting to find the right pattern.
https://drive.google.com/uc?export=view&id=14F_D3opq--9d656T5EMRxKVtCS1v5LZg
This dress looked interesting, and I always love things with pockets.
https://drive.google.com/uc?export=view&id=13fRLc9LteiosD8QXNf1UjltT4aOhtVK4
I had 3 metres of fabric to work with but by the time I pinned it all I ran out!
https://drive.google.com/uc?export=view&id=1kLPA0RCSmAxfBwu4-P9WJuQvqE65NLgu
The back of the top had a lovely shape.
https://drive.google.com/uc?export=view&id=1FSMuQmCxzYfdfVFeX1mJXUlOnulbARyL
But when I pinned it all together, it didn’t quite fit right - too big on top.
https://drive.google.com/uc?export=view&id=1nYePWqfRdJtCto8t95eJl715vB2qHYD8
The join between the bodice and skirt didn’t match up, off by almost 30cm.
https://drive.google.com/uc?export=view&id=1Ylm1AO4fTQZIBO0DM9ZGHQQIFIwG8yF-
I tried a number of different tucks to match them up - eventually got there after 4 more darts than the pattern called for!
https://drive.google.com/uc?export=view&id=167K2zCsoashMoj34ie1BzfmvSqaNqmOH
It was finished off with large pearl buttons.
https://drive.google.com/uc?export=view&id=10RF5cfggmznmfSdX6mF3cWI9YOQT03_b
And there it is - the owl dress!
https://drive.google.com/uc?export=view&id=1Xfw9xGp0krBPa91R8OhwewjzNptmesmL
https://drive.google.com/uc?export=view&id=1QgEeQbowYH9whVCFqJ_9ZI27722NnHBK

Sunday, April 5, 2020

Little People Pants

This funky fabric is from Palngun Wurnangat an independently owned Aboriginal women’s organisation based in Wadeye, Northern Territory. They make all of my favourite fabrics! 
This one is called 'Little People'. There's a cool set of photos here of how they print it, too:
I was lucky on the day of the art fair as this particular bit of fabric was on the sale table - I got 3 metres of it! I've made a lot of dresses lately, so I thought I would make a matching skirt and top out of it. I felt like it needed a long, big skirt, and a top with sleeves. But I don't have anything in pink or purple, so I decided to make pants. What a shame! 😏

It was fairly simple to cut out and fit quite well. 

But it turned out that the pants didn't quite accommodate my curves. They fit VERY well on the back, but were a little low. I had to unpick the darts and sew a yoke in, a curved addition, to bring the back up to the level of the waistband. 
Obligatory pocket!
And I was off to brighten everyone's day at work again.
https://drive.google.com/uc?export=view&id=1xPJ8R9m8eP5nb6qnK7rQelMQVLujy8yN

#lovelypennypatterns

Monday, March 11, 2019

Star Wars Bedsheets refashioned into a dress (and three skirts!)

I'm going through a dress phase again at the moment, and I'm not afraid to wear interesting things to work. So when I found these Star Wars Stormtrooper bedsheets in an op shop I had to make something!
Cue favourite pattern: 
There was plenty of fabric for a full-length dress, so I folded and pinned my pieces. I wanted to get more than one garment out of it, so I didn't necessarily follow the grain of the fabric... but hopefully it won't stretch too much.
I also cheated and combined a couple of pieces- sometimes I'm lazy! It's for me, so it doesn't matter so much.
The other skirts that I cut out:
1) Rockabilly pattern, just needs the waist band on it in this photo:
Finished:
2) Rockabilly pattern for my nerd skirt, in progress:
3) Flared skirt:
Four garments out of two bedsheets is good recycling! 
Keep an eye out for the finished dress!
#lovelypennypatterns

Friday, August 24, 2018

Disney Cosplay: Ursula from The Little Mermaid - Part 2

Continuing some costuming! Turning myself into Ursula from The Little Mermaid for a geek convention in town later in the year.

Step 3 - Over dress

I believe this dress was $1, and it has already had a cosplay life as part of my steampunk costume.
Plenty of fabric to work with in the skirt.
Hmm, it needed more bulk. Oh yes, my wedding dress skirt is still in the cupboard!
That's a lot of underskirt! But it will sit nicely.

Step 4 - the tentacles

I cut the tentacles out of the over skirt. Sealing the edge was going to be the hardest part, particularly with the curves.
 But look at it working over the purple underskirt - very exciting!
What I ended up doing was cutting the underskirt through as well and tucking the edges of both layers in. This had the added benefit of giving the tentacles some bulk, rather than them being flat.
It took an awful lot of pinning...
I was happy with the shapes that I managed though.
 It really does look like the right shape!
Now to sew it all.....

Monday, August 13, 2018

Disney Cosplay: Ursula from The Little Mermaid - Part 1

I think I'm attracted to villain costumes because they are more practical to make and wear than a lot of the heroine costumes (this is particularly true in games and anime, where they often don't wear much).
My next one: a cosplay of Ursula from The Little Mermaid.
I started with the hardest part: the underskirt.
Now that people around know that I sew, I often get surprise donations! A colleague gave me a whole box of long lengths of fabric that her sister was getting rid of. And what should be in there but purple cotton that I can use for this project!
There's enough to work with, too!
I wanted to make a skirt that can sit between the planned layers (over the white, under the black), and fabric print it with octopus suckers.


Step 1 - make the underskirt.

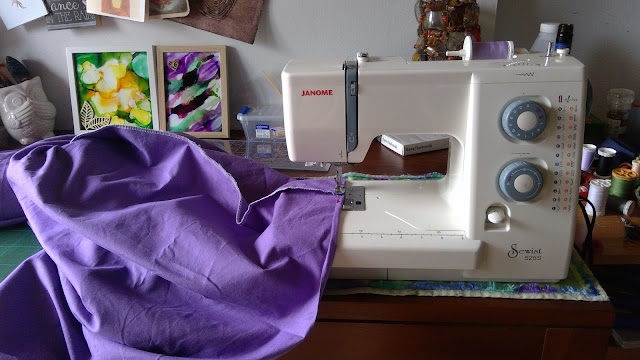
This was a relatively quick sew. I cut a panel of the darker purple and added it to the top of the pale purple, because there wasn't quite enough length in that panel.
I put a very narrow hem on the bottom, as I wanted it to be neat and not very obvious. Any length that needed to be removed could be taken from the top.
I put a tube on the top so that I could thread elastic through. 
This will be a completely separate skirt from the rest of the costume.
It came together very nicely.

Step 2 - print the octopus suckers on.

What could I use to print and how big should they be? 
The bottom of a glass bottle worked quite well.
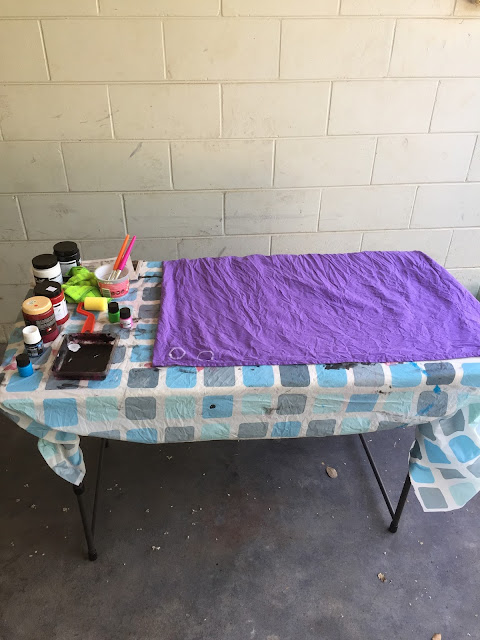
Then I just needed white fabric paint and an idea of what spacing I needed for the sucker marks. I added a white dot in the middle of all of them as well, to make them look more like suckers.
Here it is, fully printed and drying on the line. I did a heavier concentration of circles on the bottom to see how it looks. Pretty happy!
Watch this space for the rest of it!