Showing posts with label paint. Show all posts

Friday, November 2, 2018

I never thought I'd get into painting miniatures... but I did!

I never expected that I would enjoy painting miniatures, but it's been a good relaxation activity- I've really gotten into it!
This guy came in lots of very small pieces that took several sessions to glue together until he finally looked like this:
The roses were my own addition. All of these models come with only a single or limited variations. That doesn't sit well with me, so I often add to them- can't be boring! 
After that I used a spray to prime the model with a brown undercoat.
After that you start the bases. There are always multiple layers to make the colours and marking complex. The brown is the base for most of the bark armour. The orange and the green here are also bases.
The owl is about half the size of my little fingernail, if you're looking for scale. Overall he's no more than 15cm high.
It was startling bright and I was pretty worried at first, until I remembered how many layers I was going to add. Hardly any of this orange will remain.
The next layers dulled that down though. You do thin coats, so that the layer blends with the base and you get a mix of both colours. When I first started I didn't do thin coats... so my models changed colour a lot!
There's still another layer to go, otherwise that contrast between the green and orange is a bit much!
The angles are hard to work around sometimes, with the way they're built. I did snap a couple of small bits off by accident.... easy to disguise on a twiggy tree. 
This shows the second layer on the leaves, a lighter green: really happy with how they came out.
I wanted to make the staff really interesting so I added the bug on. I got a very fine detail brush to put the veins on the leaves.
I was really happy with how the leaves turned out in his beard. Again, very careful painting with a very tiny brush.
Not to mention (after a lot of swearing) how happy I was with the lime green in the runes on his armour. I pretty much through any of the default colour scheme out once I got past the two colours of bark.
The basing/decorating is one of my favourite parts though. You can't just leave them on a plain base! 
I have a stack of tiny little plants and grass that I use to build the woodland around him.
He goes in a matched set with these, so I used many of the same plants. The ones below were Summer, but I always saw him as partly between Summer and Autumn.
The rock below him is made from cork. I could have just glued him straight onto the base, but (again) I wanted it to be more interesting! 
There are always skulls in Warhammer...
And now some views of the finished model. Painting competition on Saturday!
It was fascinating to work out the colour combinations.
And I'm very proud of him!

Tuesday, September 11, 2018

Disney Cosplay: Ursula from The Little Mermaid - Part 3

Part 1 and Part 2 of this costume are done - onto the finishing touches now.

Step 4 - the Bling

Ursula wears a gold shell around her neck, the one she uses to capture Ariel's voice. She also has purple shell earrings.
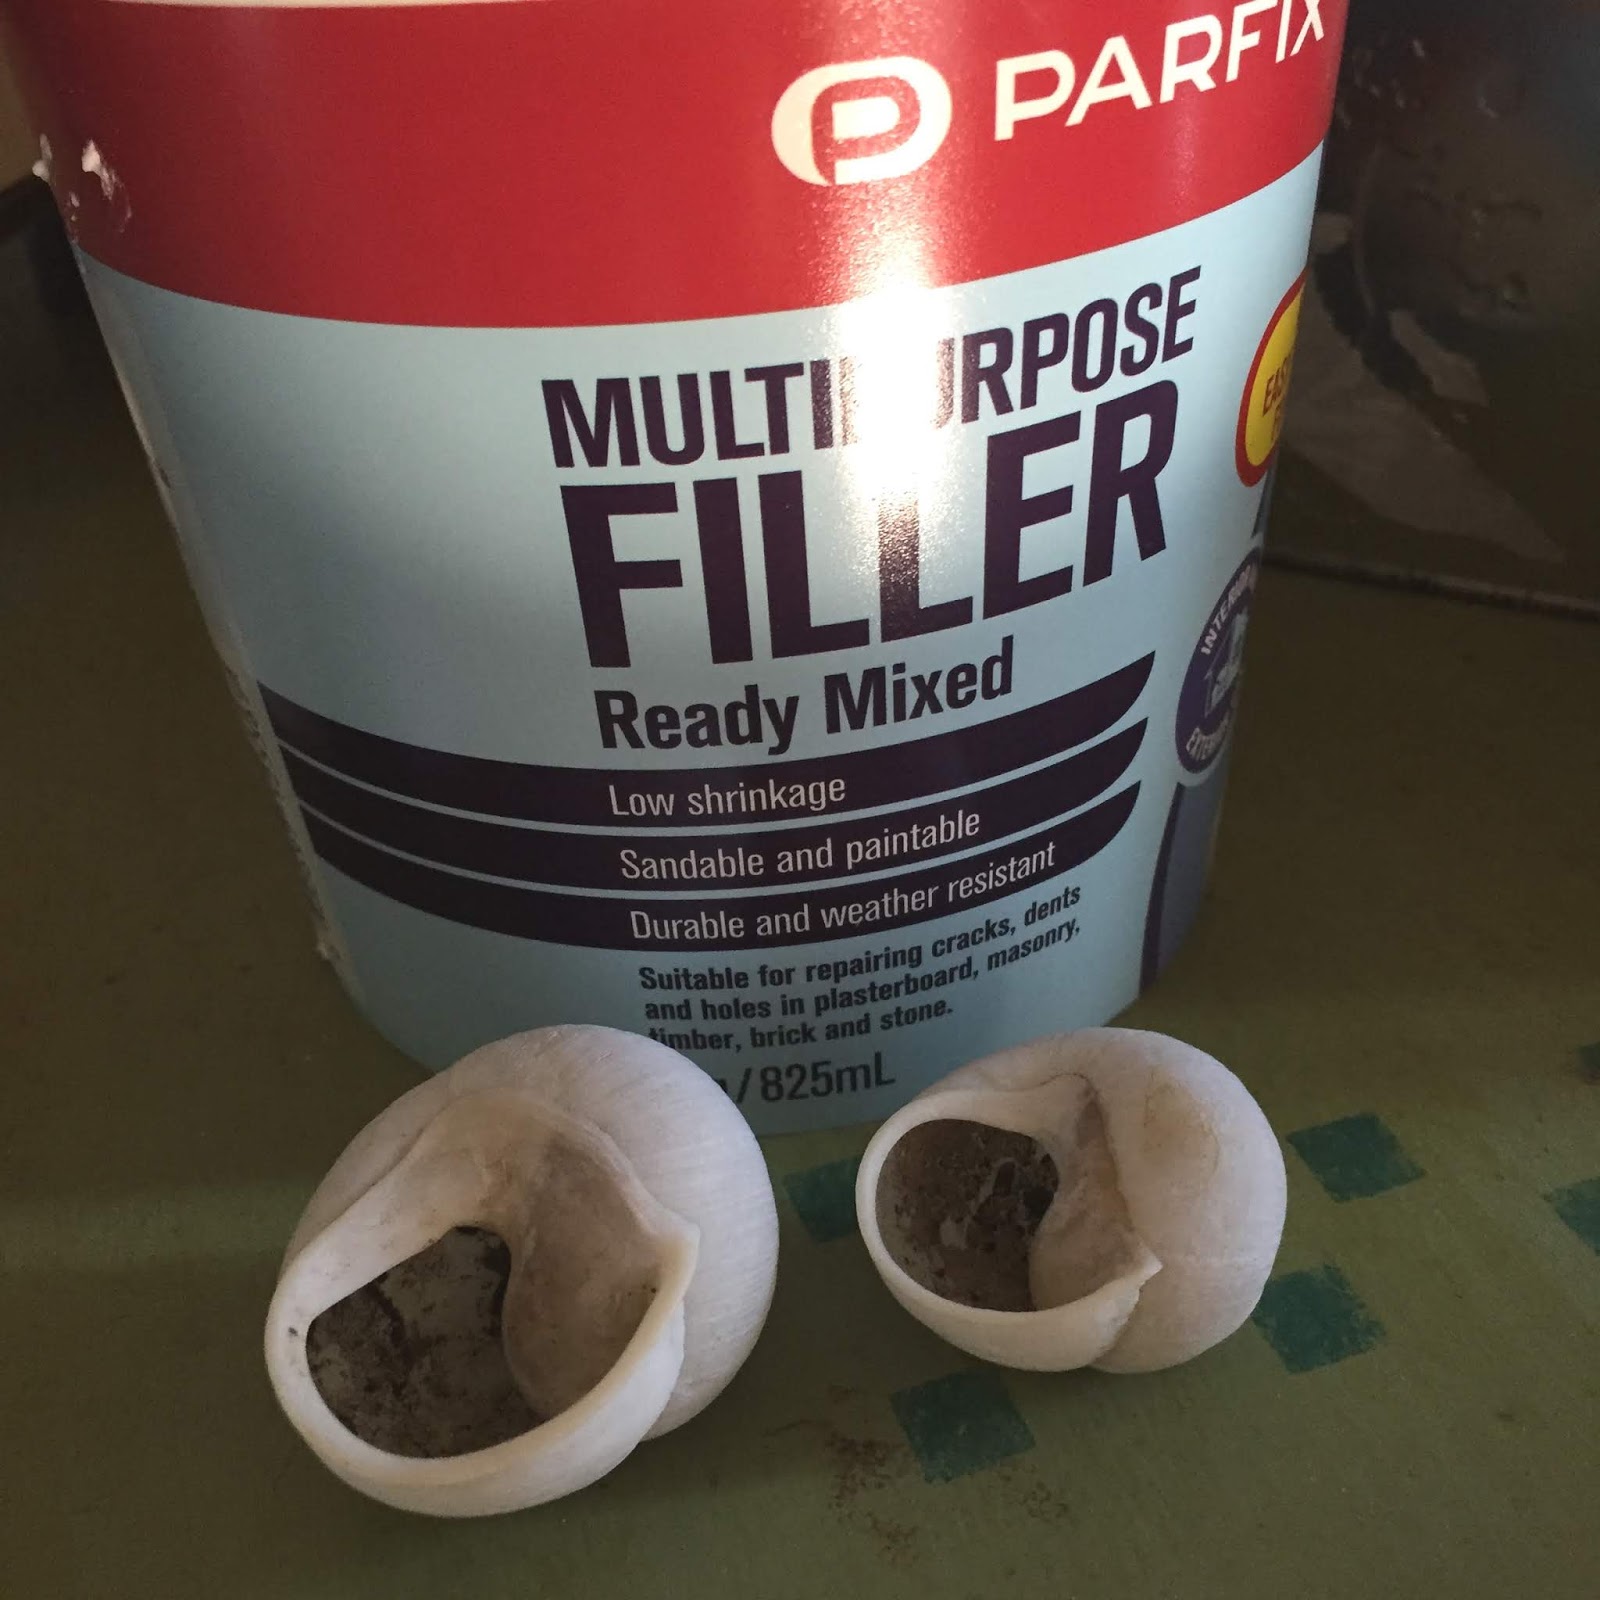
I started with two snail shells that I picked up in the bush. Not sea shells, but I had looked and had no luck finding an intact shell of a good size to use. I could have made one from scratch, but I haven't dabbled much in clay or foam so this was a good option. I did two so that I had a test one, wanting the big one to be the final one.
I filled the holes in with multipurpose filler, taking care not to stuff too much in as I was worried that it might expand.
After a week set aside to dry, I started painting. It was very pale at first, and patchy, so I knew that I would have to layer the paint.
After a number of layers they look more like this! They really shine under the light, too.
I did try adding a varnish over the top to seal the colour in, but all of my tests came out lumpy. It was like it was reacting with the paint. We even tried my husband's spray-on varnish, but it was way too blobby. So I left the shells as they were and hoped that I wouldn't encounter any water that might wash the colour off!
I glued loops of wire on the back to hang the shells off and was very happy with the finished results:
Onto the earrings.
Same process as the gold shells: found matching shells on the beach, filled the holes, and painted layers of bright purple on. Because the colour was less transparent, it took half as many coats for these.
I went and found earring attachments after some puzzling about how to connect them, needing the shaped pieces to glue on to hold the shells to the ear hooks. 
It was the simplest and most attractive way of doing it.
With the bling done, it was just the final touches left!

Step 5 - hair and makeup

I found out that Ursula was based on a real life drag queen - that explains a lot!

The makeup was achieved with a trip to a costume shop in town, because I needed thick colour to put on. I used a brush for my face below, but a sponge should give a smoother colour.
At some point in the future I would like to figure out how to airbrush colour on so that I could be all-over purple for this outfit.
I have to decide whether to just do my face (which would be a lot cooler up here) or my whole upper body - everything that shows above the dress. I'll probably go with just the face, because I'll be doing it all myself on the day and it will be hard to reach my back.
I did try a wig, but decided that I like white hairspray instead. It will be thicker on the day than what I did above!
There are some props that I could carry as Ursula:
  • The contract that Ariel signs
  • the sea witch's lipstick and mirror
  • The two eels, Flotsam and Jetsam 
  • Triton's crown and trident
But I decided that I was fine as-is. Now to wait until the day to put it all together... photos to come!
#lovelypennypatterns

Monday, March 5, 2018

Pretty Alcohol Ink Pictures

My cousin-in-law invited another cousin and I over this weekend to help her with a project. She has gotten into art using alcohol paints, where she creates pictures on glass. Like this:
This was a small picture frame, about 20cm x 20cm. Her next project was to do a much larger frame, and she thought that she would need two people to help. I'd never come across alcohol inks before and the process was fascinating. We all had a go!
You start with a picture frame and remove the glass from it.
We cleaned the glass, to make sure that it didn't have any dust or fingerprints on it that would be immortalised in the finished product. 
Things we needed:
  • foil-covered tray to work on
  • alcohol inks
  • iso-propyl alcohol
  • fire lighter

You can see the marks from previous sessions on the tray.
It was hard to choose a combination of inks, I wanted to use them all! But whatever you chose, you ended up with stained on your fingers!
Though the inks themselves are alcohol-based, adding the iso-propyl alcohol to them creates a larger, different effect. We used syringes to drip it on.
We had to work fast in this medium, because the alcohol would dry out very quickly.
Step 1 - add the colours to the glass, drip by drip.
Step 2 - add the iso-propyl alcohol. See how the spots of colour expanded with the extra alcohol added? We tried two methods. This first one was with a syringe, which gave a blotchy effect.
This second one was using a spray bottle. This had a slightly different effect, making splatters with the ink.
Step 3 - swirl or move the glass for the effect that you wanted.
Step 4 - LIGHT IT ON FIRE. 
The fire sets the ink, who'd have known? It only burned for a few seconds, but it was a bit freaky the first time!


At this point it didn't always look amazing....
But then you put them on white paper and the colours come out. This was my first one and I love it!
My other cousin did this one:
And this one:
Once they had sat out for a little while, we could put them back in their frames. The side that the ink is on faces inside, but the colours and patterns still show up well. We swapped them around until we were happy that the frames matched the contents.
Some finishing touches on a couple of them and they were done!
 I think this one still needs something, maybe some stars?
 Jellyfish?
 I love the little tail in the top right of mine, like there's some kind of creature in the picture.

As it turned out it did take the three of us to do the large piece of glass, using exactly the same technique.
We all stepped back from those flames in a hurry!
It was harder to swirl the colours, but the final look was very effective.
 I don't think I need another hobby, but this was a lot of fun!