Friday, September 29, 2017

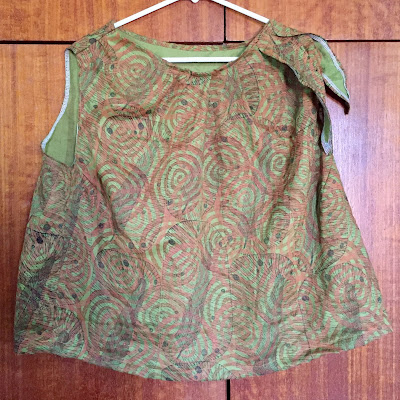
All these eco-dyed shirts... to refashion!

Between us, Mum and I have done at least 5 lots of eco-dyeing. This has resulted in my owning a range of lovely, leaf-patterned, brown-ish, grey-ish tops. I love them, but they can all tend to look a bit the same....
So i started putting braid and things on to differentiate them. Ebay is seriously dangerous for craft things. A whole bag of braid for not that much!
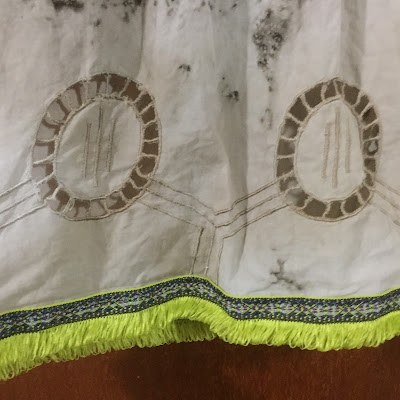
This top actually didn't appeal to me all that much until I made the sleeves shorter and added this funky, lime-green braid. Now I wear it all the time!
Still love the horseshoe print, it came out so well!
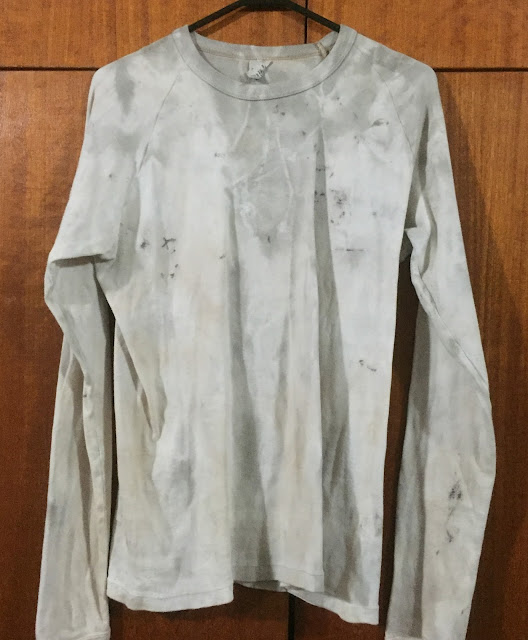
I'm doing some thinking about this one. It's a nice, simple shirt. But, strangely, the sleeves are really, really long! They cover my hands completely. Shorten the sleeves? Add something to them? Add something to the neckline? It's very stretchy, which makes it hard to add to. I did pick up packets of scraps from the Aboriginal Art Fair...

No inspiration as-yet.
This top I left as-is, but I wear a black singlet under it because it's a tad too revealing without it.
This is from my most recent lot of dyeing, with someone else's technique. The colours are striking. I pin the front up to my neck when I'm worried about sunburn, so I could add two more buttons. But they wouldn't match the existing ones.
The patterns on the back are excellent!
Even better with some braid:


I tried a lot of things with this top: horizontal braid, vertical braid. It was hard to match the existing stripes.
What I did add was a braid trim on the bottom.

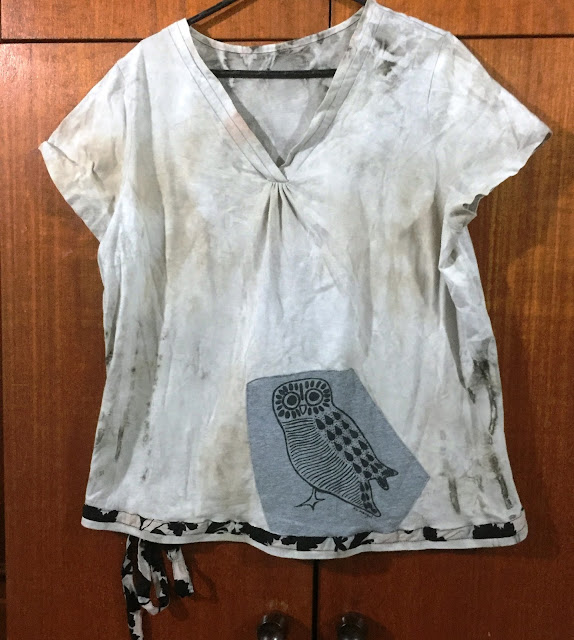
I took this owl off another shirt because I couldn't bear to part with it. The empty space on this shirt was perfect for it! It was incomplete still, so I added the trim to the bottom (which was an op shop buy for 50cents).
The little tie to the side works quite well with the odd patterns too.
This top didn't sit right, it kept riding up. A fabric belt on the bottom helped keep it down.
For this one I added a rainbow trim on the sleeves - one of my favourite so far!

Friday, September 22, 2017

Mad Hatter's Tea Party Costume/Cosplay

Each year I participate in Relay for Life, which is a fundraiser for cancer. Your team walks for an entire night, in shifts, and are sponsored for it.
This year our theme is 'Mad Hatter's Tea Party'. As we also hold a cake stall on the night, it is the perfect theme. I've been collecting op-shop tea cups and pots to display and hang on the night. Watch this space!
Because I am going to walk for hours in my costume, I want to be able to wear shorts underneath and a proper shirt with it. 
I did have a scribble for an idea:
But it was going to be an extra layer, so I decided to keep it simple. I waited until my husband cleaned out his clothes and claimed one of his vests. In our heat it would be cooler than wearing a coat or jacket. I found an op-shop bow tie to wear with it.
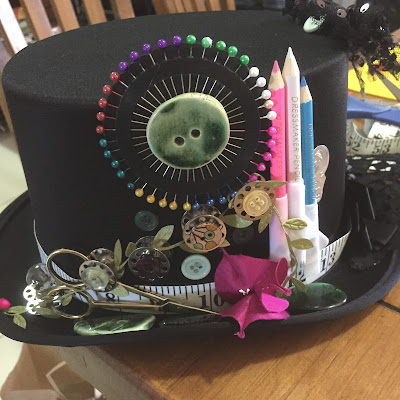
Now about the hat- I already made it for my Steampunk Seamstress cosplay!
And there I was, a Mad Hatter!

Friday, September 15, 2017

Fabric and Lino Printing is fun

One of my favourite crafts is fabric printing, particularly lino prints. I'm not an amazing designer or carver of lino but I enjoy printing with it. you can get so many different patterns and overlay effects even with just a few prints to choose from. 
Fabric printing can be messy: it certainly is when I do it. I wear old clothes that I'm not afraid to mess up, because I invariably end up with paint all down my arms, on my knees, and even on my face.
I don't really plan things with my craft. I put some paint on a stencil and plop it down, look at it and then start to see what it all might look like.

These are the results of an afternoon of printing with a friend. We kept pulling clothes out to add to until we'd run out! This included a lot of little shorts and shirts for her son, which turned out great.
You can print on a lot of things, but cotton works best. You can iron it to set and it holds the paint well.
My lino blocks include:


This was a stencil that I cut out of a plastic projector sheet:
They are hand carved or cut. You really can do any design that takes your fancy, as long as it prints clearly. If you aren't sure, you just do a test print and fix what needs to be fixed. 

I was lucky enough to belong to an art group for a few years and we did a lot of great projects together. When I moved cities they all got together and printed a bed cover for me. all of the blocks used were hand-designed originals from the members.
I was also commissioned last year by someone at work to make a sign for them to take to the ANZAC Day football match. What do you think?
I used the side of a sponge to create the poppy petals and small scrap booking stamps for the other shapes.

I don't print as often as I would like to, but when I do it is great fun!

Friday, September 8, 2017

Refashioning the Whirlygig Skirt

Remember this skirt?
I enjoyed making it and it is amazing fabric. But the skirt didn't quite work. The double ties was frustrating, the underskirt fabric turned out to be too crush-able and it was a nightmare to iron. I think I only wore it twice. 
So I removed the leaf panels and kept thinking about it.
Why didn't I just make a normal skirt with this fabric? It's too light. There's clingy and then there's clingy!
I finally decided to find a pre-made underskirt. Save some time and effort making one. It took several months of searching but I finally found one. Viscose, so very comfortable. And just the right style.
An elastic waist, which made it easy to get on and off.
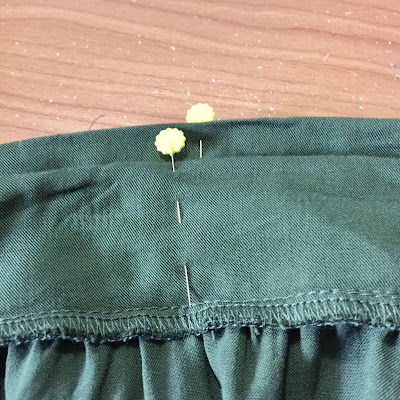
Unfortunately a size too small, but that is never insurmountable. I marked out two places to cut so that I could insert panels to make it bigger.
 Two cuts in the front.
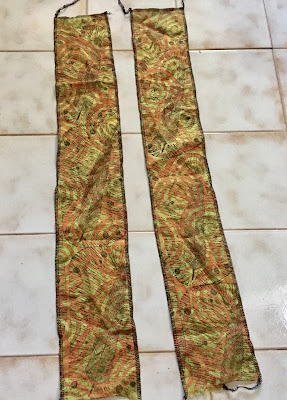
 And two strips to insert.
In progress...
.... and that worked well!
Onto the overskirt. What if I kept them separate? 
I had seen an outfit at a fashion show that had a longer skirt that tied over the top of the underskirt and I loved it:
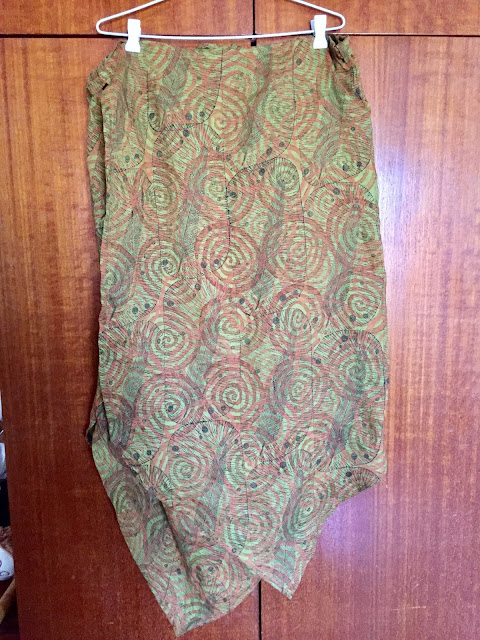
I cut out a third petal and sewed the three together into a wrap skirt, essentially:
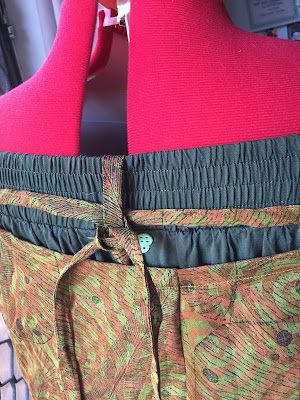
I don't like my skirts to ride up, so I thread the ties through loops on the skirt itself to hold it in place. I created my own tubing to use for the loops:
And fitted them on the sides and the back. I tried attaching one to the underskirt, to see if I could link the two together. 
It didn't work so well. So I kept it separate and concentrated on the ties.
In the end I left the two skirts completely separate. The overskirt sat well over the top of the other one anyway, without it attaching to it. I wasn't concerned that it would look odd.

I had made a matching top, too. And I should have taken photos as I finished the top, but I forgot.
 I made a fold detail on the neckline.
Easier to see from the inside:
And some details on the left shoulder: 
I thought that it might be too much, the top and the full skirt of the whirly fabric. So I kept them separate until I could try all three parts together. But it was a success!

Friday, September 1, 2017

Swimming Shrimps Dress

I looked at this fabric in several different colours at several different craft fairs before I lucked out and got this piece on sale. I nearly didn't buy it, because I already have a lot of blue clothes. But blue does look good on me!
The fabric is from Injalak Arts, Northern TerritoryIt's sat in my stash for 12 months now, so it was time to use it. But first, to hand wash it. It's important to pre-wash things because you find out if the dye is going to run, or if the fabric will shrink, and any other small issues you might have.
I have a lot of skirts these days, so I decided to make myself a dress. I did look at the patterns that I already owned, but most of them needed more than the 2 metres of fabric that I have. I also hate dress patterns... so I made my own! You can see how I did it here.
It is a princess-cut pattern, with internal folds down the front in place of darts to create shape around the bust.
The first thought I had was about the grain of the fabric. The grain runs paralell to the selvage edge of the fabric and it determines how the fabric will sit and hang. This is the sealed edge:
You are meant to cut with the grain of the fabric, so that the fabric hangs correctly - particularly important if you are using stretch fabrics. 
This fabric is a cotton linen and it has a bit of give in it, but it's not too bad. But if I cut it with the grain the pattern won't run the way I want it to (vertical stripes are more slimming, visually).
I think that it will be okay if I cut it on the cross-grain, which runs at 90 degrees to the grain.
I doubled the material over, pinned my pattern down and cut out around it. It wasn't quite as wide as I wanted, for a more flared skirt, so I had to be content with more shape. I cut the front and back out together, so that the edges would match.
I had some pockets pre-made and ready to go, because I love having pockets on my clothes. So useful!
I cut the neckline with a more rounded shape than what I had on my pattern.
You can see that when I cut it, on the right side the material wasn't quite even. This is how I got it, just means that the material wasn't cut straight by the supplier. A shame.
The only difference with the back panels was the extra room that I left around the arm holes, for movement.
 Pinned onto the manikin to get the princess folds into place:
 And all pinned together, and boy did those curved folds cause me some trouble!
 But here it is completely pinned and ready to sew:
 So then I sewed it all together and hemmed the bottom edge. 
I wanted to do something a bit different for the collar and had seen a couple of stand-up/folded varieties that I wanted to try. This was a tube of fabric connected to the top of the dress. Stiff enough that it would stand up, but could also be folded over. It worked beautifully!
 When I tried the dress on for fit I added some pins around the arm holes, for a couple of places to tidy up.
 A slight blip here where some of the fabric had caught in the seam I was sewing. I didn't want to unpick the whole thing, so I left it this time. Something to remember to avoid next time.
And completed dress!
 

All dressed up and ready to go to an awards ceremony. Very happy!
And the scraps used for something, too: